Drawings & Plan Sheets
The Drawings workspace is TrafficCAD's sheet composer: a full-screen, multi-sheet editor where your live plan becomes a titled, true-to-scale drawing set. What you see on the paper stage is exactly what exports to PDF — the stage and the PDF share one renderer, so there are no export surprises.
Opening the workspace
Click Drawings in the top toolbar (tooltip: "Drawings — generate traffic control plan sheets"). It's also in the command palette under Project.
The workspace opens directly — the first time on a blank sheet S-1 ("Traffic Control Plan"). To frame the plan, click Viewport in the top bar:
Drag a box on the map to frame the view — Shift keeps the sheet aspect, Esc cancels
Drag the box and the viewport lands on the sheet, fitted to the nearest standard engineering scale. The first viewport you add becomes the sheet's plan view; add as many more as you need the same way.
Frame in any orientation
The box follows your current map rotation. Rotate the map first (hold the right mouse button and drag) so a skewed corridor runs across the sheet, then drag the box — the viewport keeps that orientation, and its north arrow rotates to match. A north-up map still gives the classic north-up sheet. The same applies to every box you drag (Viewport, New sheet from a drawn extent, Redraw extent…), and you can fine-tune any viewport's Bearing in the inspector afterwards.
The workspace at a glance
Three panes:
- Sheets (left) — the sheet navigator: add, reorder, duplicate, delete sheets.
- The paper stage (center) — a WYSIWYG rendering of the current sheet. Everything on it is selectable and draggable.
- The inspector (right) — properties for the selected item, plus the drawing-set fields (title block, paper, logo).
The top bar holds the add-item buttons, Undo/Redo, zoom controls (Zoom in / Zoom out / Fit), and Preview PDF / Export PDF.
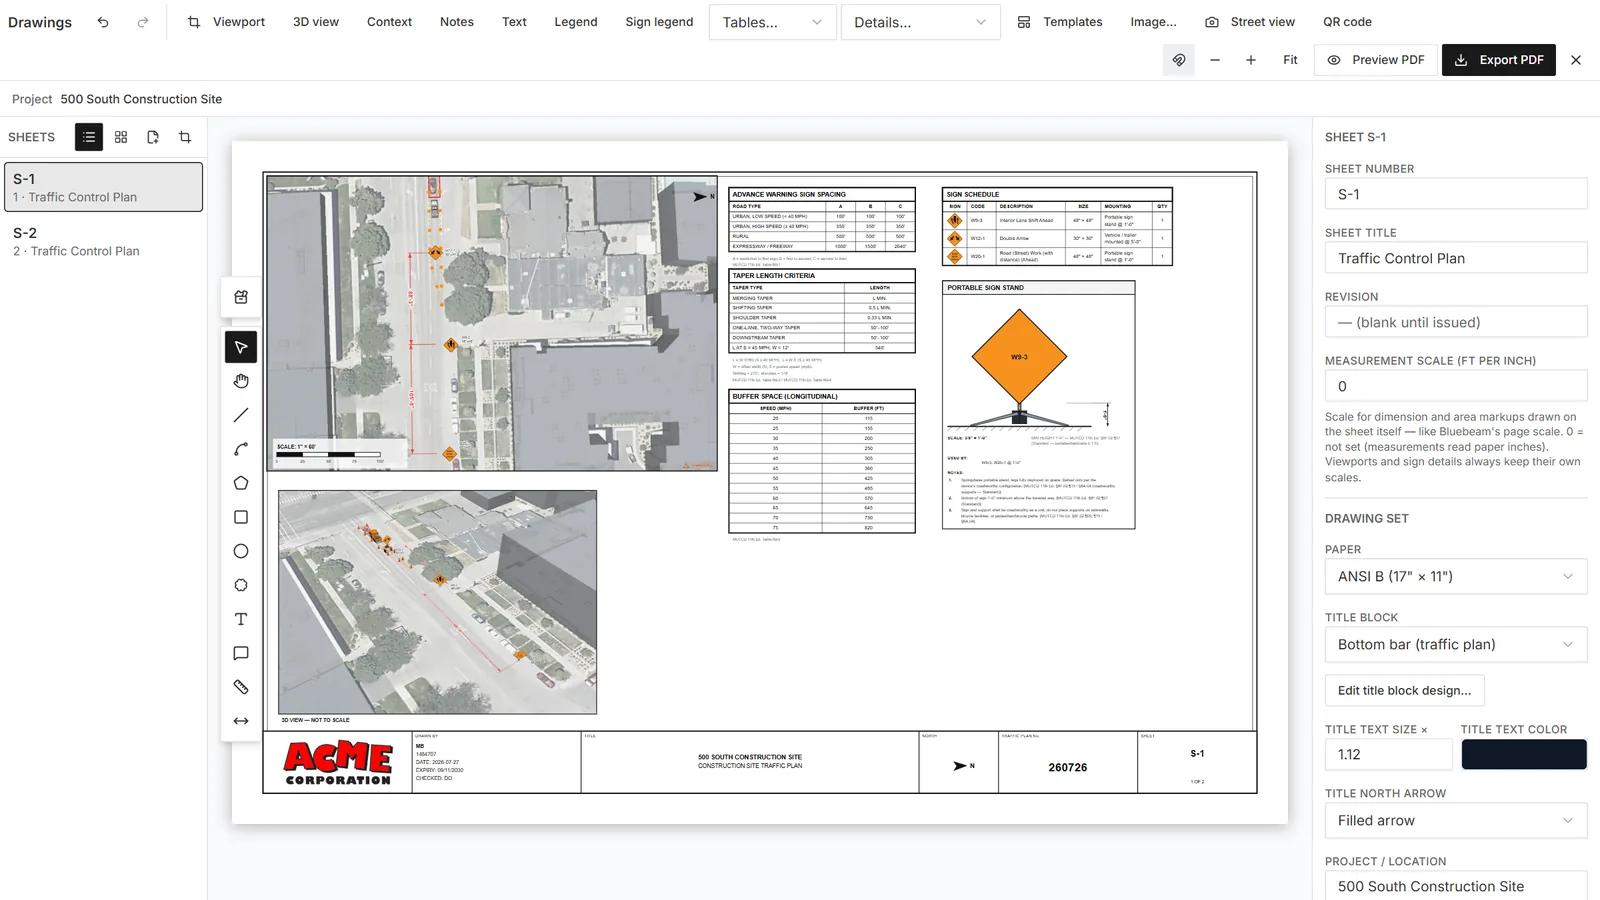
The Drawings workspace: sheet navigator left, WYSIWYG paper stage center, inspector right, add-item buttons across the top.
Managing sheets
In the Sheets navigator:
| Action | How |
|---|---|
| New sheet, same framing | The New sheet button ("New sheet (same area, drawn extent)") — clones the primary viewport. |
| New sheet, new framing | The crop button ("New sheet from a drawn extent") — drag a fresh box on the map. |
| Reorder | Hover a sheet row → Move up / Move down. |
| Duplicate / Delete | Hover a sheet row → Duplicate / Delete (the last sheet can't be deleted). |
| Rename / renumber | Select the sheet, edit Sheet number, Sheet title, and Revision in the inspector. |
New sheets auto-number S-2, S-3, … — and follow whatever prefix you renumber to, so a set changed to TCP-1 carries on TCP-2, TCP-3. Every sheet shares the drawing set's paper size, title-block style, and project fields, so the set stays consistent.
What you can put on a sheet
The top-bar buttons add items to the current sheet:
| Item | What it adds |
|---|---|
| Viewport | A map view — drag its extent on the map. The first viewport on a sheet becomes its plan view; later ones are insets with the default caption "DETAIL". |
| 3D inset | A pitched perspective view (55° tilt, satellite basemap), captioned "3D VIEW — NOT TO SCALE". |
| Context | An overview viewport at 2× the primary's scale, captioned "CONTEXT". |
| Notes | A GENERAL NOTES box, pre-seeded with MUTCD citation notes you can edit. |
| Text | A free text block. |
| Legend | The markup legend (devices, areas, roads). See Schedules & Legends. |
| Sign legend | The sign legend table (code/name, dimensions, count, notes). |
| Tables… | Sign schedule, Device schedule, or a cited MUTCD reference table — sign spacing (6B-1), taper lengths (6B-3/6B-4), device spacing (6K.01), buffer space (6B-2). |
| Details… | A dimensioned sign mounting detail — all types in plan, or a specific support (portable stand, skid, ground post, Type 3 barricade, flag tree, vehicle-mounted). Field crews build from these. See Sign Mounting. |
| Templates | The template browser — MUTCD typical applications and tables inserted as editable vectors. See Typical Applications & Templates. |
| Image… | A PNG/JPEG image (site photo, agency stamp). |
| QR code | A QR square that opens your live map link on a phone — see Sharing & Collaboration. |
| Blocks… | Your uploaded reusable blocks (shown once you've uploaded one via the inspector). |
Every viewport can carry a north arrow and scale bar — toggle them in the viewport inspector. Each viewport also carries a small TrafficCAD wordmark in its bottom-right corner; it is part of the frame chrome (not a sheet item), so it prints on every export and can't be moved or deleted.
Viewports: live captures with vector markups
Viewports honor the Layers panel: features stack in layer order and each layer's opacity slider dims its markups on the sheet and in the PDF exactly as on the map (editable Bluebeam annotations stay solid — they're objects, not paint).
A viewport is not a screenshot. The basemap is captured live, and your markups render on top as crisp vectors — signs, device chains, roads, walkpaths, parking lots, fences, channelizers, TTC plans, pavement markings, work areas, and dimensions are all re-drawn at paper scale, identical to the PDF output.
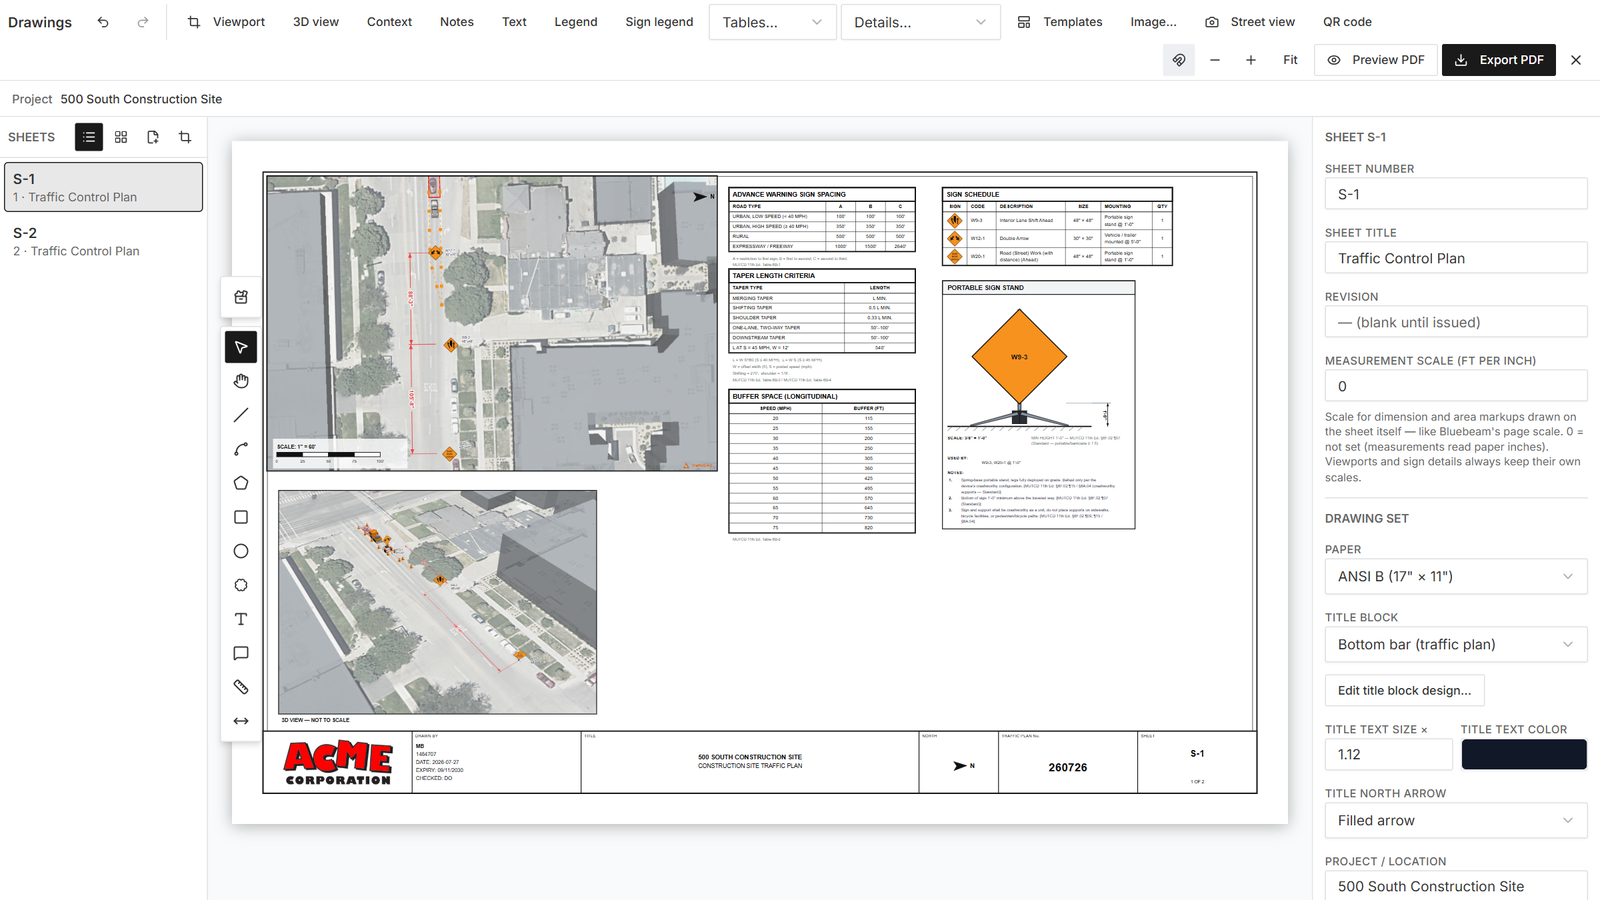
A single-sheet set: the viewport captures the basemap live and re-draws every markup as vectors at paper scale.
- Everything stays in sync. Move a sign on the map and the sheet, legend, and schedules update. Move it on the sheet and the map updates — sheet edits write back to the same markup store.
- Edit markups on the paper stage: select, drag, rotate (R for +15°, Shift+R for −15°), and delete (Del) signs right on the sheet. Plan viewports are fully editable; 3D insets are select/delete only.
- Recapture: pan/zoom/imagery changes recapture automatically ("capturing…" shows in the top bar). Use Redraw extent… to reframe a viewport, or the refresh button ("Recapture the basemap") to force a fresh capture.
- Basemap masks are the one markup that bakes into the raster — they hide map features under everything, which is their job.
Set a viewport's Scale from the grouped dropdown — Engineering (imperial): 1"=10' through 1"=100'; Metric: 1:100 through 1:2500 — or keep the auto-fitted value (shown as "1" = 50' (fitted)"). A viewport's Basemap can be the default map style or Aerial imagery, with per-viewport imagery overrides — see Aerial Imagery & 3D.
Arranging and editing items
- Move — drag. Shift constrains to the dominant axis. Items snap to a 1/16-inch paper grid.
- Duplicate in place — Ctrl-drag an item CAD-style; the copy drags and it's one undo step.
- Duplicate — Ctrl+D (or right-click → Duplicate) copies the selected items a quarter inch down-right. Works on every item kind, including viewports, 3D views, and street views — the copy of a primary viewport becomes an independent inset you can reframe.
- Signs inside a viewport — click a sign stamp to select it; Shift-click (or drag a box) to multi-select. Press + / − to scale the selected stamps (labels follow), R to rotate, Del to hide them in that viewport. The viewport inspector's Sign size slider scales all stamps in the frame.
- Resize — drag the edge/corner handles. Tables, legends, notes, and mount details resize by width (they flow their own height). Shift locks aspect on viewports and images.
- Vector templates — double-click an inserted MUTCD figure to enter node editing: move element vertices, edit text (font, size, alignment), restyle fills/strokes/hatches, delete elements with Del, exit with Esc. Node text supports Helvetica, Times, and the Highway Gothic series (B–F, E-Modified).
- Undo — the top-bar Undo (Ctrl+Z) / Redo (Ctrl+Shift+Z) buttons act on whatever changed last, whether that was a sheet item or a map markup.
Paper sizes and title blocks
Paper (set once for the whole set): ANSI A (11"×8.5"), ANSI B (17"×11") — the default, ANSI D (34"×22"), ARCH D (36"×24"), and ISO A4/A3/A2/A1/A0.
Title block — two styles, chosen in the inspector:
- Bottom bar (traffic plan) (default) — the strip along the bottom: DRAWN BY / ID / DATE / EXPIRY / CHECKED cells, the TITLE cell (project location + work description), a north arrow, TRAFFIC PLAN No., and SHEET + REV with "n OF m".
- Right strip (engineering) — the classic right-edge strip: brand block, COMPANY, PROJECT, CLIENT, PROJECT No, DRAWN BY, CHECKED BY, DATE, SCALE, a five-row REV/DATE/DESCRIPTION revision table, the sheet title, and the big sheet number.
Fill the set-wide fields in the inspector — Project / location, Work description (title lines), Traffic plan no., Drawn by, ID, Date, Expiry, Checked by, Company, Client — plus Upload logo… and Disclaimer (under the logo) to brand this document.
A new drawing set starts from your firm's Company info, so the name, logo, and disclaimer are usually already there. The brand cell prints the logo if there is one, the Company name if there isn't, and falls back to "TrafficCAD / TRAFFIC CONTROL" when neither is set. Editing them here changes this document only — existing sheets never re-brand when the firm's defaults change.
The quick single-sheet exporter
For one-sheet jobs, click the dropdown arrow beside the toolbar's Drawings button and choose Sheet export… : pick Paper, Scale, and Layout (Single view, Plan + 3D inset, Two views) and click Export sheet PDF — it centers the sheet on the current map view at the chosen scale, with the cited basis-of-design notes in the GENERAL NOTES column. The title fields arrive prefilled from your Company info (firm name, logo, and disclaimer) plus the Project properties on the left rail's Settings tab; any edit in the dialog applies to the current project only. For anything beyond one sheet, use the Drawings workspace.
Persistence
The drawing set — sheets, items, title-block fields, logo — is saved inside the project file and restored exactly on reopen, like every other part of the project. See Projects.
Scale discipline
Viewports capture at a fixed ratio — never "zoom to fit". If the plan doesn't fit the sheet, pick a smaller scale (1"=100' instead of 1"=50') or a larger paper, exactly as you would at a drafting board.