Generate a TTC Plan¶
Let the MUTCD engine design a lane closure for you — then tune it, read the compliance report, and make it yours. About ten minutes.
1. Get a road with real parameters¶
Click Auto Site in the toolbar and drag a box around your work site (leave Roads checked in its dropdown). The street arrives as parametric road segments carrying lanes, width, posted speed, and road class from the map data. Click your street and sanity-check Posted speed (mph) in Selected road — the speed drives every taper and spacing number.
(No network? Draw the road with the Road tool and set its lanes and speed by hand.)
2. Draw the work zone¶
Pick the Polygon (or Rectangle) tool and draw the work footprint over the lane you're closing. Draw it parallel to the road — the analyzer treats the zone as station-uniform, so a tidy footprint gets the tightest layout.
3. Generate¶
Right-click the shape → Generate traffic control plan.
TrafficCAD projects the zone onto the road, measures which lanes it occupies, classifies the closure strategy (lane closure, one-lane two-way, shoulder work…), and replaces your shape with a live TTC plan: advance signs at Table 6B-1 spacing, a taper per Table 6B-3/6B-4, buffer per 6B-2, device chains at §6K.01 spacing, flaggers or an arrow board where the strategy calls for them, and editable dimensions for every component.
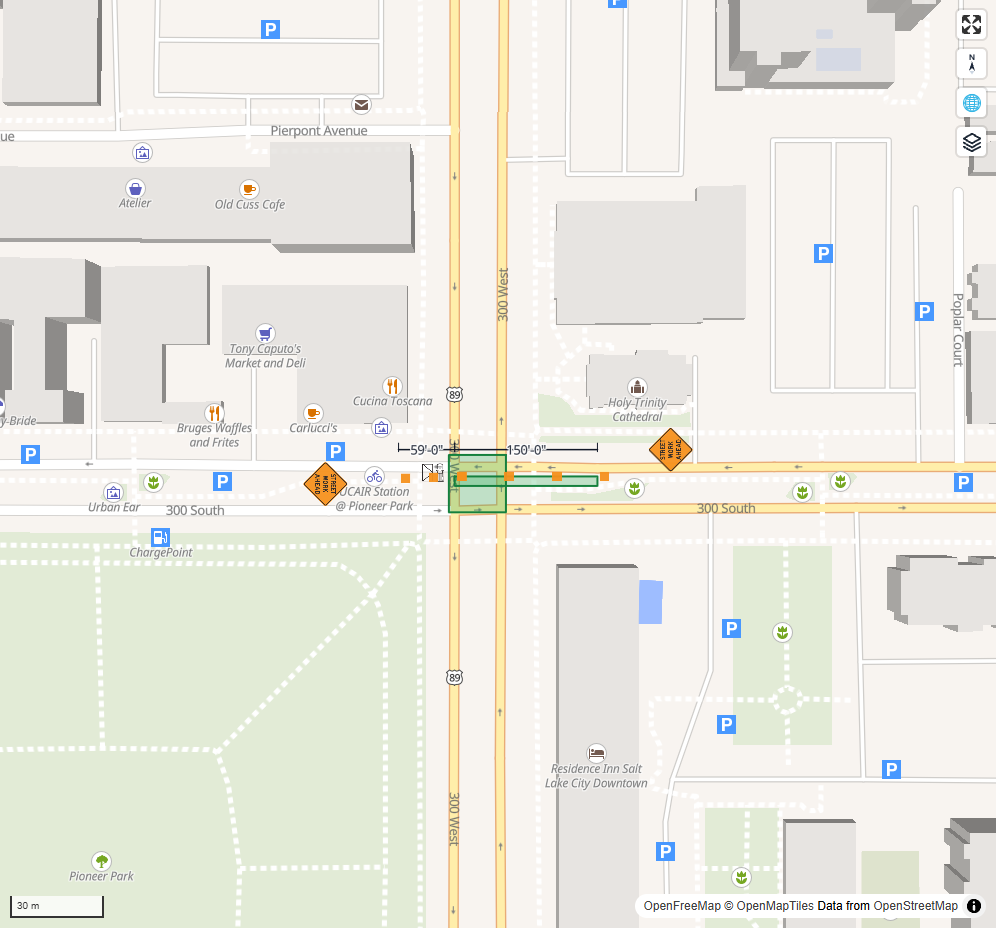
A generated shoulder-encroachment plan: the advance series, taper, and device chain land at the cited spacings for the road's speed.
4. Confirm the speed¶
Select the plan. The panel header names the strategy and its TA citation. First stop: Speed (mph) — verify it against the posted speed, then check Speed confirmed. The unconfirmed-speed warning clears, and if you changed the speed, the whole plan re-derives.
5. Tune it¶
Everything the manual treats as an Option is a control:
- Switch Devices (cones → drums), toggle the shadow vehicle or arrow board, set the taper side.
- Type a Buffer or Taper override — if you go below the table value, a cited finding appears; nothing blocks you.
- Drag the work-zone vertices and watch the tapers, devices, and dimensions re-derive live.
- Tilt the camera: the cones stand up as 3D devices.
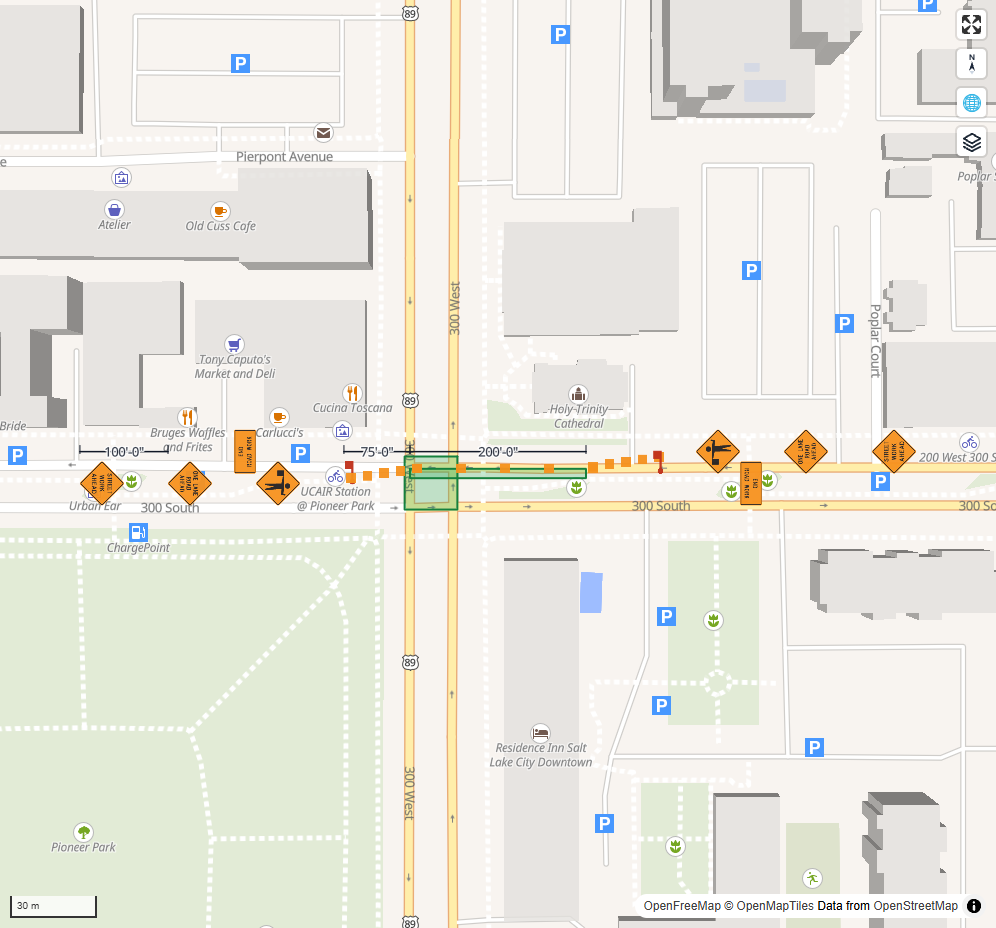
Options are controls: this one-lane, two-way closure carries flaggers at each end — switch devices or toggle protection and the layout re-derives.
6. Read the compliance report¶
The MUTCD compliance list at the bottom of the panel is your self-review: errors (a Standard violated), warnings (Guidance not met), and info notes — each with chapter and verse. Fix what matters, own the deviations that are engineering judgment.
7. Make it a deliverable¶
Open Drawings, frame the plan, and add a Sign schedule and the cited MUTCD tables — then publish.
Prefer to describe the job in words?
The Tool Chest's AI plan generation section takes "Utility crew closing the northbound lane for 200 ft; posted speed 30" and drives the same deterministic engine. See AI Plan Generation.
Reference: Traffic Control Plans (MUTCD)
Next steps: Taper a Work Zone by Hand when you want one run tapered rather than a whole closure generated · Review the Plan in 3D & Street View to check it from the driver's seat · Publish & Share for the sheet set.